Brushwork. The skilled application of paint by means of a brush. It is at the heart of being a skilled painter. Even today with airless sprayers and cordless spray guns, it always comes back to the brush. All painting is basically a means to efficiently transfer paint to a surface in a controlled manner. Brushing is still the most efficient and controlled way to paint.
Like all things, what makes for good brushwork is practice but there are ways to shorten the learning curve. I have had pretty good painters on staff over the years that could cut a straight line with a worn, gnarly brush but that is the exception. You want to invest in the best you can get your hand on.
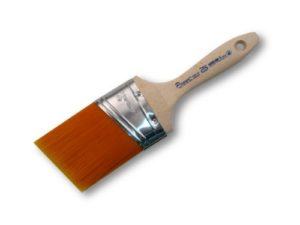
There are many good paint brushes available. Two brushes I like are the Purdy 3 inch pro extra swan and the Proform 3 inch Picasso. These are great brushes. Between the two, the Purdy wears better and lasts longer but the Picasso is a great brush. I just hate that it wears out much faster then the Purdy. The Picasso definitely has an expiration date.
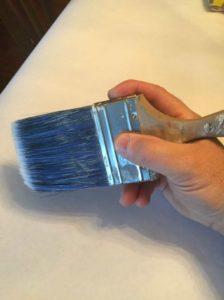
Once you have the right brush, get use to having it in your hand. You want the part of the handle closest to the ferrule of the brush to rest on the webbing between your thumb and index finger. Your fingers then hold onto the metal ferrule. Practice with a dry brush on a wall. This is a good way to get use the the feel of the brush.
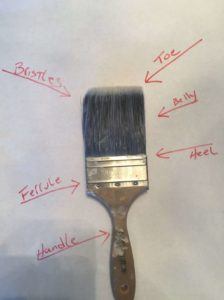
The parts of a brush are of course the handle, ferrule, heel, belly, and toe. Pretty obvious where the bristles are.
One of the tougher cuts with a brush is where the wall meets the ceiling. If you are in a situation where you are going to paint the walls and ceiling in a room, this is a good scenario for practice on the wall to ceiling cut. Since you are going to paint the ceiling anyhow, any paint you might get on the ceiling you can paint over with the ceiling color.
One of the big mistakes many people make when brushing is not loading enough paint onto the brush. Using a good comfortable cut bucket, pour enough paint into it so it is not too heavy. A couple inches is good. Push the bristles of the brush down into the paint enough to flex the bristles and pick up paint. One good swipe on the side to wipe any drips and your ready to go. The working part of the brush is the first inch or so. You don’t want paint all the way up the bristles and on the ferrule. Keep all but the working part of the brush clean as you work.
One good long swipe about a half to a quarter inch away from the ceiling will give you a “glide path” for the second pass. Think of it as lubing the wall to make the cut smoother. As you go back for the second cut you will notice how much easier the brush runs along the wall. You just bring the cut closer to the ceiling until you get a good cut. If you notice ceiling texture in the groove where the wall and ceiling meet, run a putty knife or five in one along the wall and ceiling to make a nice channel to cut into.
When brushing woodwork the biggest mistake people make is brushing back into areas previously coated/brushed. This will give you brush marks as the paint sets up. A nice trick is to use floetrol or a bit of water in latex paint to slow down the set up time and give the brush lines enough time to level out. In alkyd paint use penetrol.
When you invest in quality brushes, always clean them well after use. Don’t leave them in paint for long periods of time or store them overnight covered in paint.
People often ask how to determine the size of the brush to use. My standby is the 3 inch beaver tail pictured above. There are times a different brush is necessary. Two factors always determine the size of brush to use. The size of what you are painting and how much detail there is. The smaller the target the smaller the brush. fine detail means a smaller brush. For spindles or divided pane glass I would use a 1.5 or 2 inch brush. I sometimes use very small artist brushes for fine detail or hard to reach areas.
You can find yourself in situations where the cut of the brush matters. An angled cut makes it easier to reach areas and gives you more control for detail work. A flat cut helps you cover more surface area faster.
Use man-made bristles for water based products and natural bristles for alkyd, varnish, etc.
A quick tip off, in most cases, for the quality of a brush, besides the price, is the handle construction. Cheap handle materials = cheap brush (Plastic). Good handle craftsmanship, materials = quality brush.


